Resizing Main Partition Using gparted in a VM
If your main partition (/dev/sda1) is filling up inside of your virtual machine, follow these steps to make it bigger inside of VMware Player
- Locate the originally downloaded Ubuntu image (~1.2GIG) or download it again
- In VMware player, right-click the image and goto settings. Select
CD/DVD (SATA)and then browse for the ubuntu image underConnection. Check theEnablebox underPowerOnso that the VM will first attempt to launch the DVD image. - Power on the image and during the initial splash screen, press
F2to enter the BIOS. - Change the boot sequence so that
Boot From CDis first in queue. - Restart the VM and when the CD boots up, press
Try Ubuntu - Launch
gparted - Temporarily remove the swap partition so that the unallocated region aligns with the first partition.
- Resize the main partition
(/dev/sda1)to include all of the space MINUS 1024 MB! - Create a logical partition at the end and make it as the swap space.
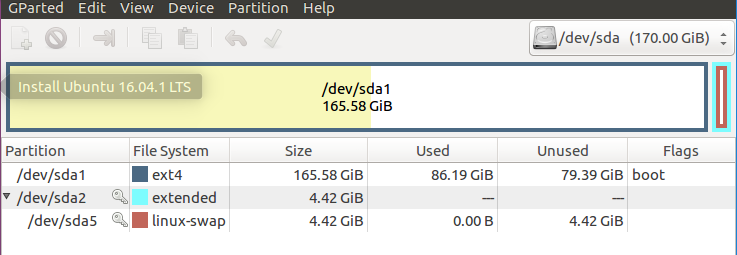
- Make sure to right-click the swap partition and select “SwapOn”
- Exit the live-cd and unmount the CD image inside of VMware player. You can leave the bios as is
Converting a monolithic image to multiple separate files
When creating a VM, you can either create a single file or multiple files. The single file is better for performance, while the multiple file setup is easier to expand in 2GIG increments. Read this article and then download vdisk-manager since it doesn’t come with VMPlayer and only Workstation in order to convert the large image into a lot of smaller separate files.
Leave a Comment
Your email address will not be published. Required fields are marked *
Note - Sometimes a comment submission will fail. Simply press the "Submit Comment" button again until a green success box is shown